Best Way to Record Remote Interviews With Separate Tracks for Premiere Pro
Recording a remote interview is easy now.
You open a browser tab, invite your guest, and hit record.
The hard part comes later — when you open Adobe Premiere Pro and realize the recording you just made is basically unusable for professional editing.
You don't want merged audio, flattened video, or a file format like WebM that Premiere refuses to recognize.
This happens constantly to journalists, podcasters, YouTubers, and interview creators who record online and edit professionally afterward. And it almost always comes down to the same two problems: no separate tracks, and a format called WebM.
This article walks through why that happens, why it matters, and the cleanest workflow to fix it.
Problem #1 - Why Browser Recordings Break in Premiere Pro
Here is something most creators do not realize until it is too late.
Browsers record in WebM.
WebM is lightweight, browser-native, and technically reliable for capturing video inside Chrome. It is a perfectly good format for the web. But Adobe Premiere Pro does not support WebM natively. There is no built-in import. No automatic fix.
Editors who try to open WebM files in Premiere hit an immediate wall. The workaround is installing a third-party plugin called Fnord — and even then, users run into audio codec conflicts, Media Encoder failures, and performance issues that slow down the entire editing process.
Adobe's own community forums are full of threads from editors frustrated by exactly this problem. Requests to add native WebM support have been submitted for years. As of 2026, it still is not natively supported.
So if you recorded a remote interview in your browser and now want to edit it in Premiere, you are either converting files manually, wrestling with plugins, or starting over.
None of those are good options when you have a deadline.
The Second Problem: Everything Is Merged Together
Even if you solve the WebM issue, most browser recorders hand you one file.
One video. One audio track. Everything flattened together.
That sounds fine until you actually try to edit it.
Inside Premiere Pro, separate tracks are everything. Professional interview editing means being able to touch each piece of the recording independently. When everything is merged, you lose that control entirely.
Here is what separate tracks actually let you do in Premiere:
Fix one speaker's audio without touching the other
Remove a cough, a door slam, or an interruption from a single channel
Normalize volume levels per speaker independently
Adjust music or system audio — including any clips or media playing during the interview — without affecting the dialogue
Cut awkward pauses cleanly without creating sync problems
Build social clips faster by isolating the webcam and audio separately
Apply noise reduction to one track without degrading everything else
That is not a small list. That is basically the entire post-production workflow for a professional interview.
The difference between a merged recording and separate tracks is the difference between "something you recorded" and "something you can actually edit."
What Journalists and Interview Creators Are Actually Asking For
Over the past several months, we started noticing a pattern with Podsplice users.
Journalists. Interviewers. Podcast editors working for media outlets. Creators with real production deadlines.
They were using Podsplice to record remote interviews and then editing the footage in Premiere Pro, DaVinci Resolve, and Final Cut Pro afterward. And they kept asking the same thing:
"Where do I download the separate tracks? Where do I export multitracks? I need them to edit in Premiere."
These are not casual creator questions. These are professional workflow questions.
It told us something important: the recording itself was not the problem. The export pipeline was.
Professional editors do not just need a video file. They need assets. Clean, separate, editing-ready assets that drop into their timeline without friction.
That became a major focus for us.
The Podsplice Workflow for Premiere Pro
Podsplice is browser-based. No software to install. No OBS setup. No audio drivers. No virtual routing.
You open a tab, share a link with your guest, and start recording.
But what happens behind the scenes is different from most browser recorders. Podsplice captures everything locally on each participant's device, not just a compressed stream through a server. That means recording quality stays high even over unstable connections.
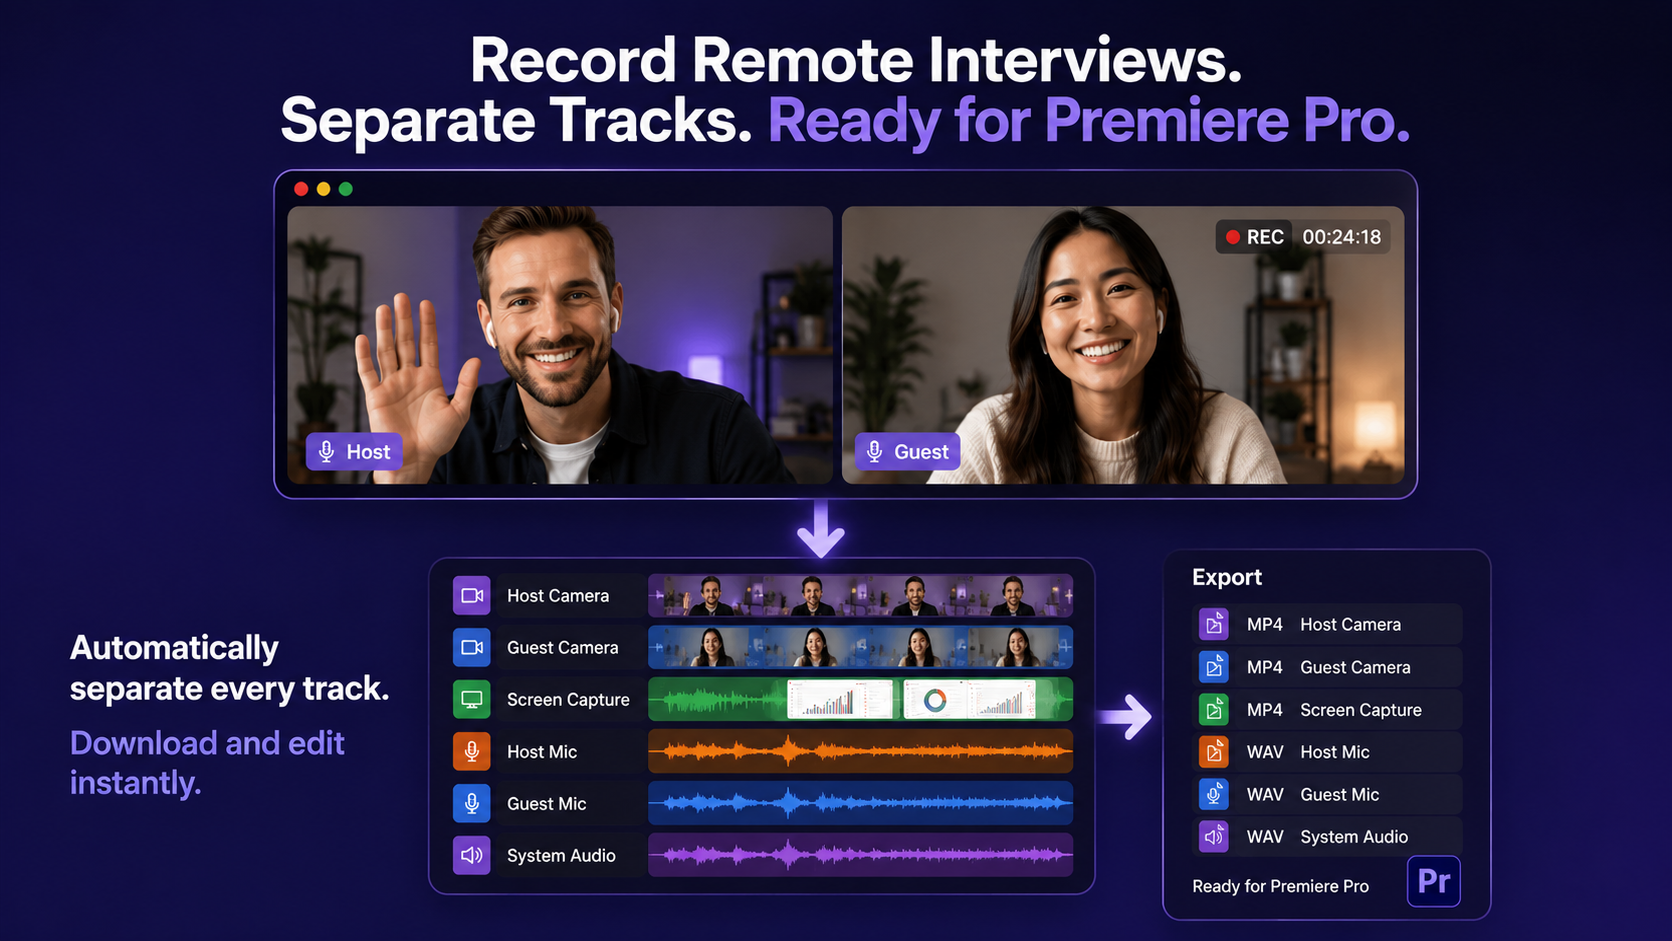
More importantly, every source stays on its own track:
Host camera — separate
Guest camera — separate
Host microphone — separate
Guest microphone — separate
Screen recording — separate
System audio — separate
Six independent tracks. Each one is downloadable as its own file.
When you are done recording, you download MP4 video files and WAV audio files — the formats Premiere Pro actually works with natively. No conversion step. No plugin required. You drag them into your Premiere timeline and start editing.
If you do not need separate tracks for a particular project, Podsplice can also export a single merged file — one clean, high-quality video ready to share without any editing required. The choice is yours, depending on the project.
System Audio Is a Bigger Deal Than Most Editors Realize
This one gets overlooked constantly, and it matters especially for journalists and interview-based creators.
System audio means capturing whatever is playing through your browser or computer during the recording — a YouTube clip, a news segment, a product demo, a piece of music, a video you are reacting to.
Most browser recording tools either skip system audio entirely or bake it into the main mix with no way to separate it later.
Recording system audio (also called 'internal audio") is a great feature because in many interviews, you might want your guest to react to a video clip. Like, "I want to play this clip for you and get your reaction". Without the ability to record system audio, you couldn't hear the clip you are playing for your guest.
Podsplice records system audio on its own independent track.
That matters in Premiere Pro because you can:
Adjust the volume of a referenced clip without touching the speakers
Cut or trim a media reference independently from the conversation
Apply different audio treatment to system audio versus microphone audio
Remove system audio entirely from certain sections without affecting anything else
For journalists who play back clips during interviews, for creators who do commentary or reaction content, for anyone who references external media mid-recording — this is a significant editing advantage.
The Workflow in Plain Terms
Record in the browser. Download separate tracks. Edit in Premiere Pro.
No WebM conversion. No merged files. No plugin drama.
The recording phase stays simple — browser tab, shared link, one button.
The editing phase stays professional — individual MP4 and WAV files, separate tracks for every source, and clean import into Premiere.
That combination is harder to find than it should be. Most tools optimize for one or the other. Either they make recording easy and editing painful, or they give you professional-grade complexity that makes setting up a project in itself.
The same workflow also works cleanly in DaVinci Resolve, Final Cut Pro, CapCut Desktop, and Adobe Audition — tools like Riverside and Descript have their own export workflows, but if your editing pipeline is Premiere-first, the format and track structure matter from the moment you hit record.
Why This Matters More Than It Used To
Remote interviews are not going away.
If anything, the expectation has flipped. Guests now assume they can join from wherever they are. Editors assume the footage will be production-ready. Creators assume the workflow will not require an IT degree to set up.
The recording tool is no longer just the thing that captures video. It is the first step in the production pipeline. And if the first step produces the wrong format, merged tracks, and a WebM file that Premiere will not open — everything after that gets harder.
Journalists filing stories on deadline do not have time to convert files. Podcast editors working across multiple shows do not have time to manually separate merged audio. YouTubers building a content library do not have time to rebuild a broken edit because the source tracks were unusable.
The recording should set the edit up to succeed, not fight it.
The Bottom Line
If you record remote interviews and edit in Adobe Premiere Pro, the two things that will slow you down most are WebM format issues and merged audio tracks.
The fix is choosing a recorder that was built with the editing workflow in mind — one that captures separate tracks locally, exports in formats Premiere actually supports, and does not require a conversion step between recording and editing.
Browser-based recording has become genuinely good. The missing piece for most tools is what happens after you stop recording.
That is the gap Podsplice was built to close.

About the Author
Andrew Best
Andrew Best is an entrepreneur, educator, and AI expert with over two decades in online marketing. He co-founded China232 — a podcast and learning platform with 10M+ downloads — and later 88Herbs, a premium supplement company. Andrew now focuses on helping creators leverage AI for podcasting, screen recording, and YouTube content through Podsplice.
More from Podsplice

Faceless YouTube Monetization: Why Faceless Does NOT Mean AI Slop
Blog
How to Record a Scam Website Demo with Screen, Voice, and System Audio
Article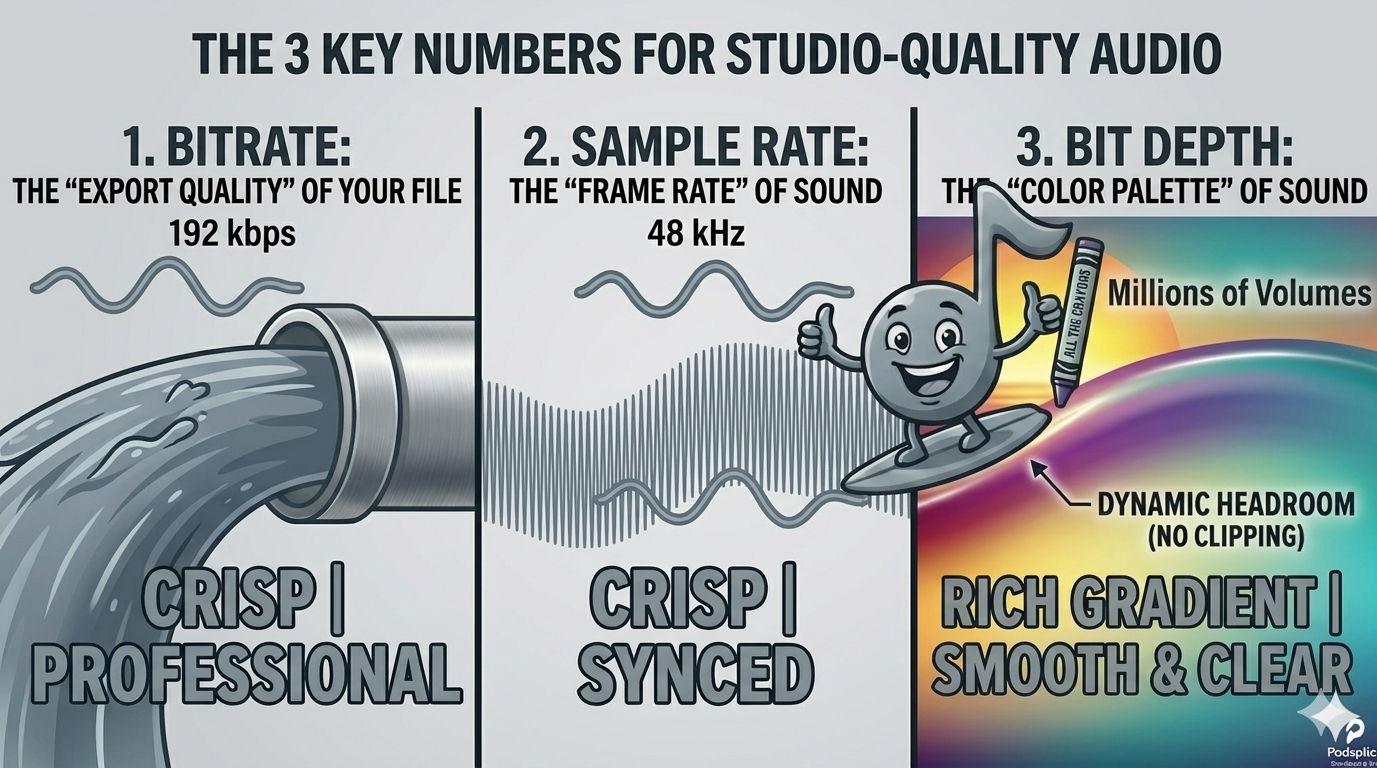
Bitrate vs. Sample Rate: The Creator’s Guide to Crisp Audio
Article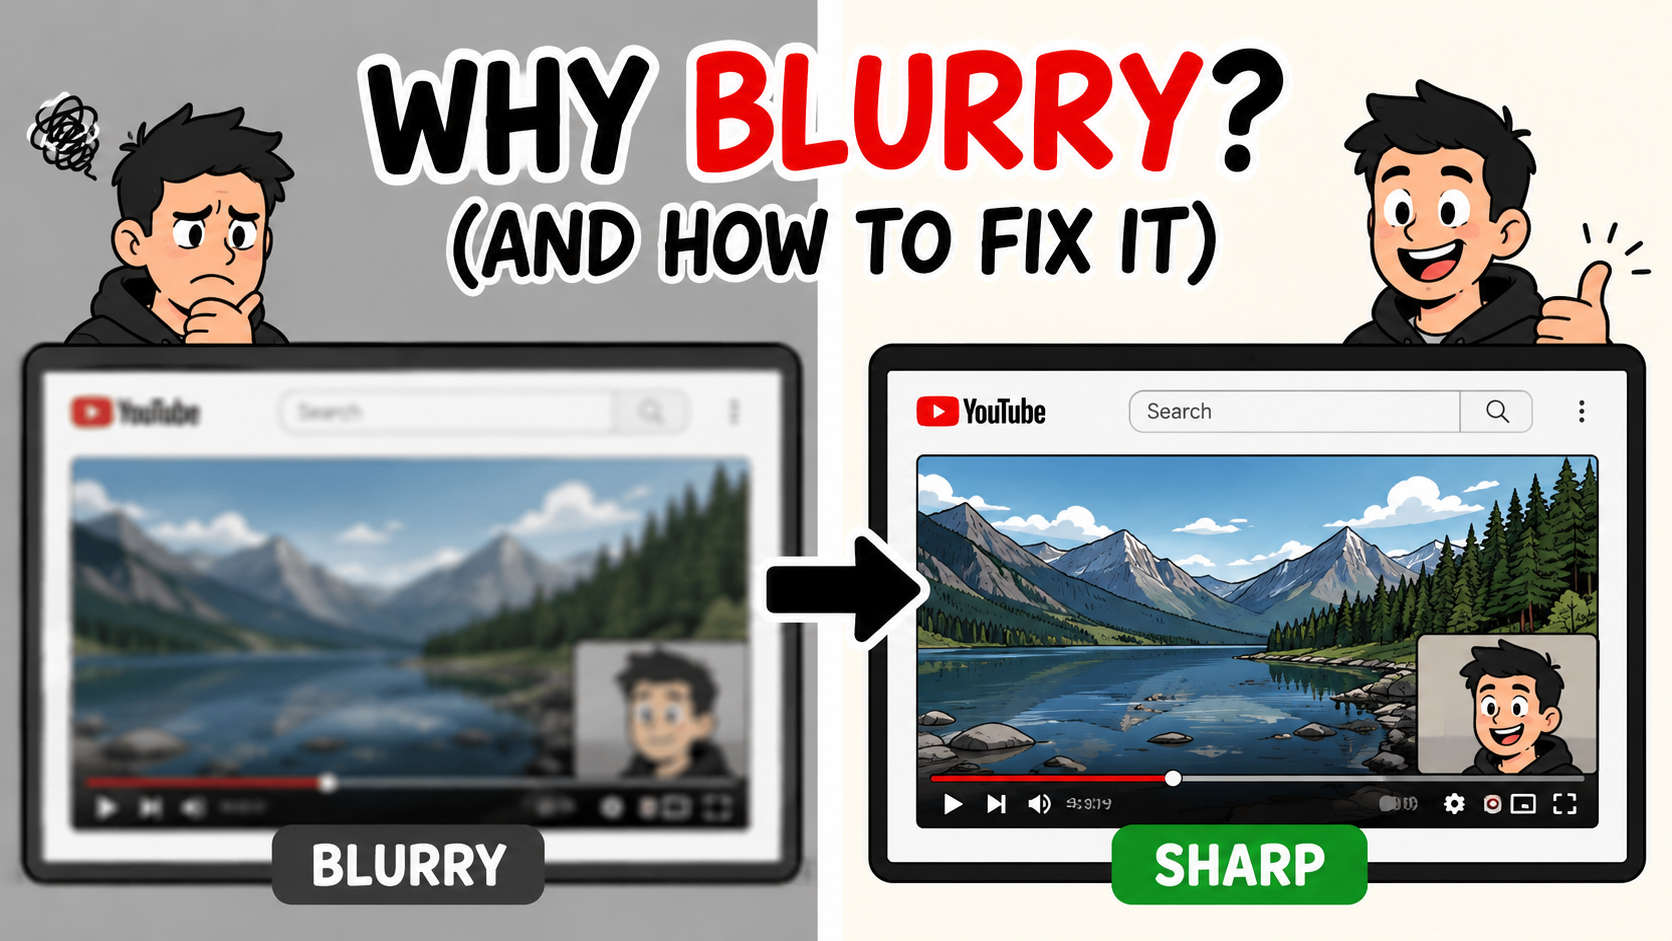
Why Your Screen Recordings Look Blurry (And How to Fix It)
Article
How to Record a Remote Video Lesson with Two Instructors and Screen Share
Blog
Start Recording in Seconds
No downloads. No setup. Just hit record and share your story with the world in studio quality.
Looking for a Screen Recorder or Remote Recording tool?