
Record System Audio on Mac and Windows
Podsplice lets you record your screen, webcam, microphone, and computer audio at the same time.
This is useful when you want to record:
YouTube videos
Website demonstrations
Tutorials
Reaction videos
Screen-share videos
Faceless videos
Presentations with audio
The setup is slightly different on Mac and Windows, especially when recording system or browser audio.
Start a New Recording in Podsplice
Open Podsplice and choose New Recording.
For this type of recording, select Overdub Mode.
Before you start, make sure your correct:
Camera
Microphone
Screen
System or tab audio
are selected.
If you do not see your webcam preview, check that the correct camera is selected before recording.
Mac: How to Record System Audio
On Mac, the easiest method is to use Google Chrome and share the specific Chrome tab that contains the audio you want to record.
Step 1: Open Podsplice in Chrome
For the most reliable results, open Podsplice using Google Chrome.
If you are using Safari and having problems capturing audio, switch to Chrome.
Step 2: Choose Overdub Mode
From the Podsplice recording screen, select:
Overdub Mode
This lets you record your webcam, microphone, screen, and shared audio together.
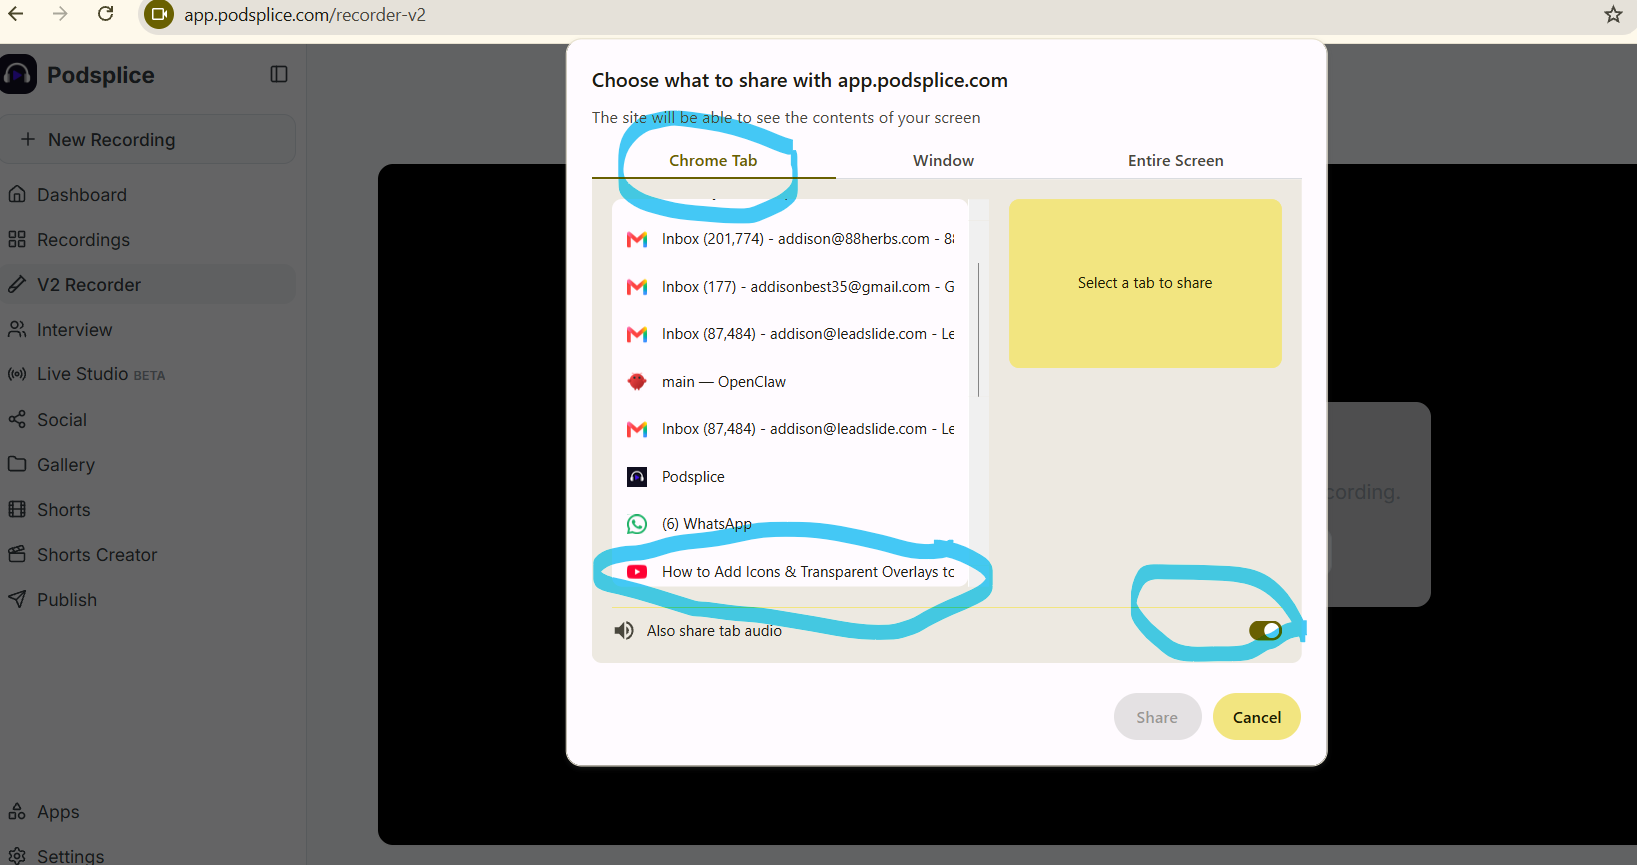
Step 3: Share a Chrome Tab
When Podsplice asks you what you want to share, choose:
Chrome Tab
Select the tab containing the video, website, or other content you want to record.
For example, if you are recording a YouTube video, select the Chrome tab where YouTube is open.
Step 4: Turn On Tab Audio
Make sure:
Share tab audio
is enabled before confirming the screen share.
This is the important step.
If tab audio is not selected, your screen may record correctly but the audio from the video or website may be missing.
Step 5: Start Recording
Once your camera, microphone, Chrome tab, and tab audio are selected, click Record.
Keep the Podsplice recording tab open.
You can then switch to the Chrome tab you are recording and play the video or demonstrate whatever you want to show.
Windows: How to Record System Audio
Windows gives you more flexibility when choosing what part of your computer you want to record.
You can record:
A browser tab
A window
Your entire screen
Step 1: Open Podsplice
Open Podsplice and choose:
New Recording → Overdub Mode
Step 2: Choose What You Want to Share
When the screen-sharing window appears, you can select:
Chrome Tab
Window
Entire Screen
If you want to demonstrate several programs or move between different windows, Entire Screen can be the easiest option.
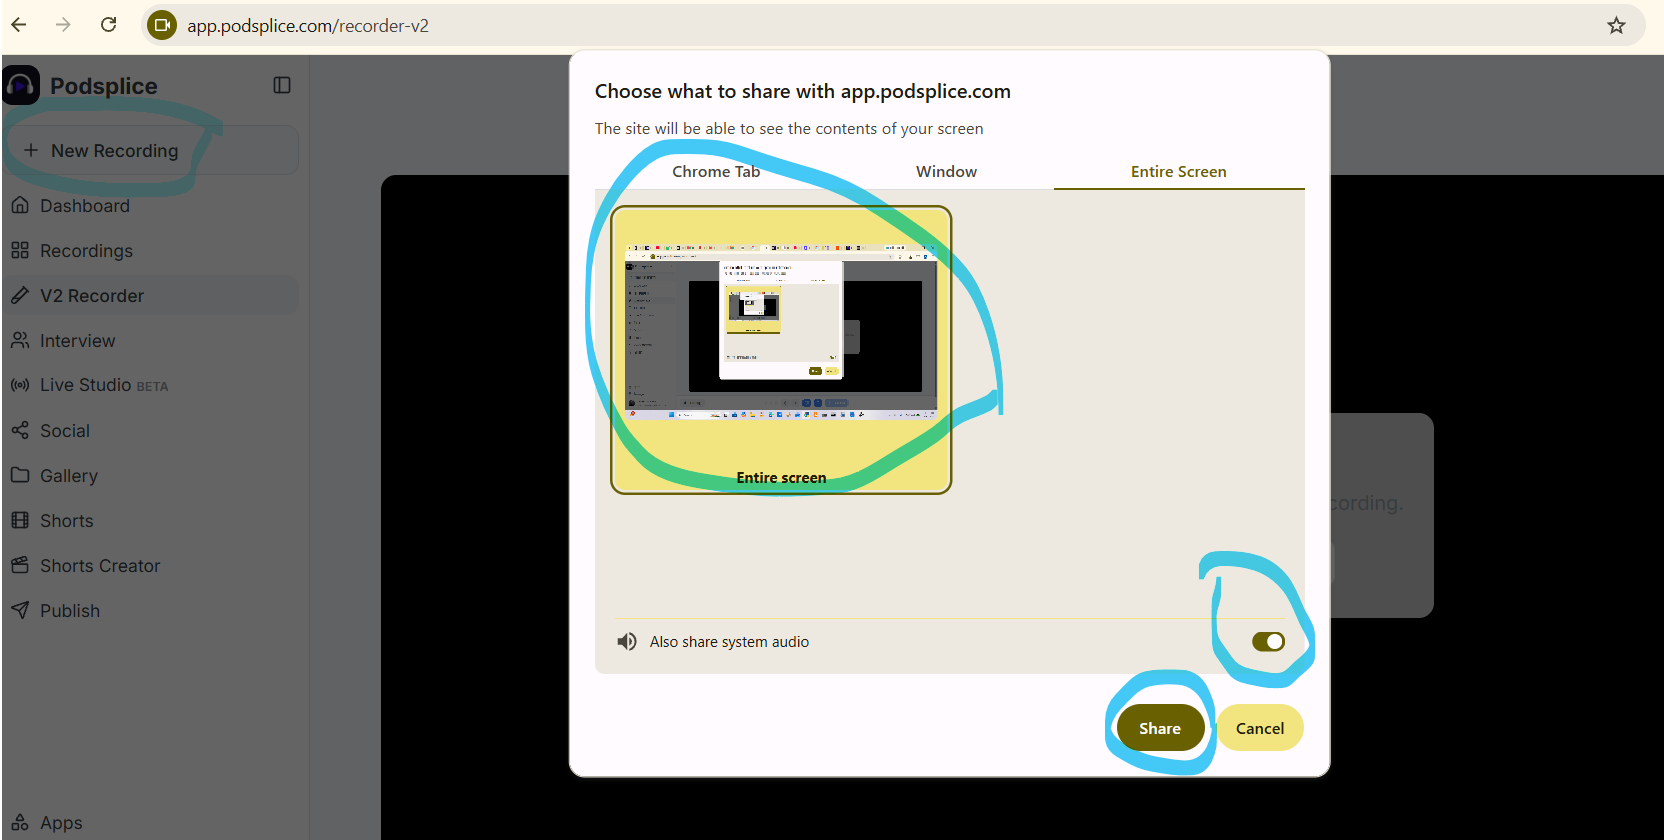
Step 3: Turn On System Audio
Before confirming your screen share, make sure:
System Audio
is enabled.
This allows Podsplice to capture the audio playing from your computer along with your screen recording.
Step 4: Start Recording
Once everything is selected correctly, start your recording.
You can now move to the screen or application you want to demonstrate.
Mac vs. Windows: The Main Difference
The main difference is how you share computer audio.
On Mac
Use Chrome Tab sharing and make sure Share tab audio is turned on.
On Windows
You can share a tab, window, or entire screen and enable System Audio.
For both Mac and Windows, Chrome is recommended if you are having trouble getting your audio to record correctly.
Check Your Podsplice Tracks After Recording
When you finish recording, click Save and Go to Editor.
Your Podsplice project can contain separate tracks for:
Screen recording
Webcam
Microphone
System audio
Keeping these tracks separate gives you more control when editing.
For example, you can change the size and position of your webcam without affecting your screen recording.
Create a Faceless Screen Recording
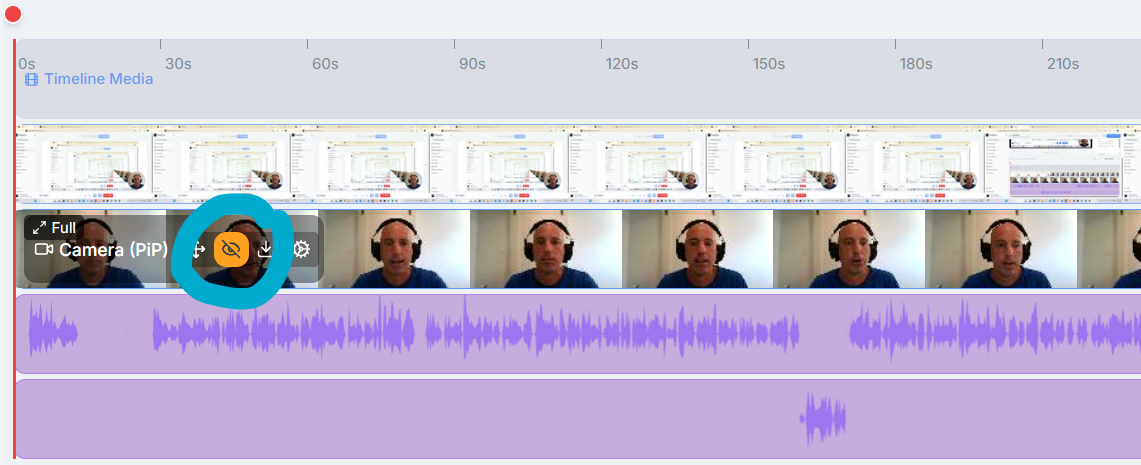
If you recorded your webcam but decide you do not want it in the finished video, you do not have to record everything again.
Simply select the webcam track in the Podsplice editor and hide it.
Your video can then become a simple faceless screen recording using your screen and audio.
You can also bring the webcam back whenever you want.
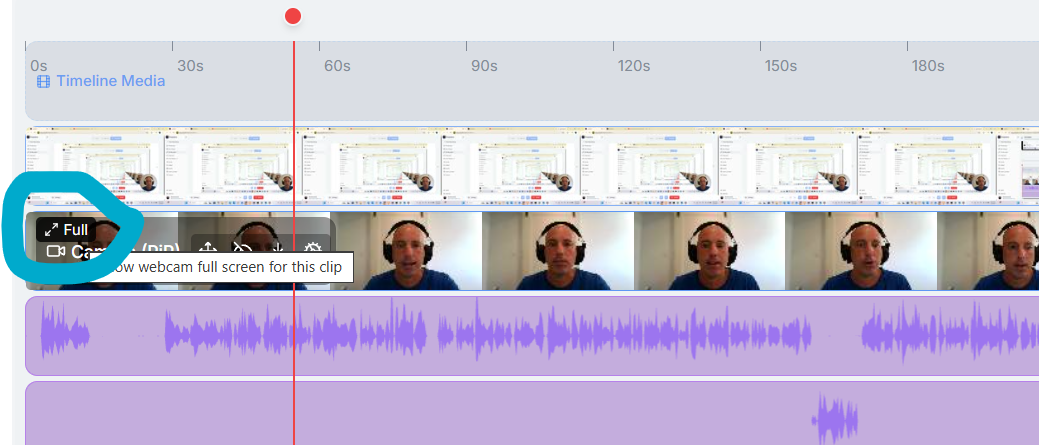
Show Your Webcam Full Screen
You can also create different sections of your video where your webcam becomes the main focus.
For example, you could have:
Your webcam and screen visible together
A full-screen screen recording
A full-screen webcam section
Another screen-share section
This lets you create a more polished tutorial while still recording everything in one session.
Export Your Finished Video
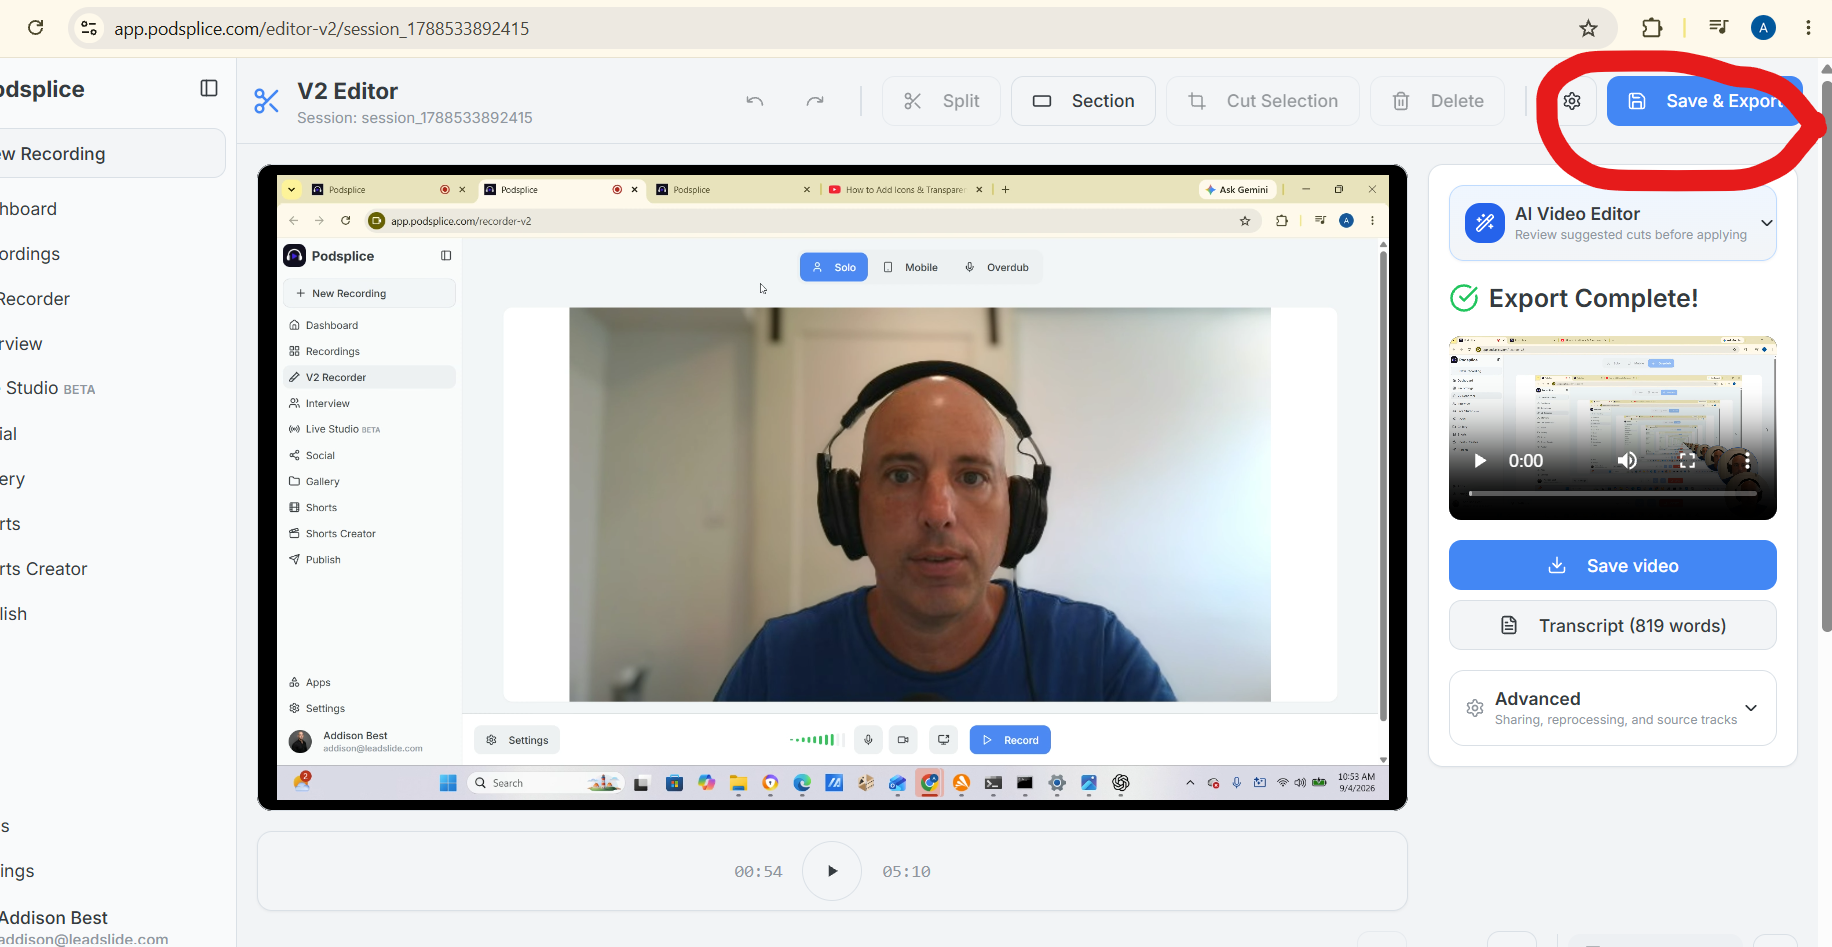
When you are finished editing, choose:
Save and Export
You can adjust your layout before exporting, including the position and size of your webcam.
You can also add other elements such as:
Slides
Different layouts
Visual sections
Other editing elements
Podsplice then combines your selected tracks and edits into your finished video.
You can also download the individual recording tracks separately if you need them.
Troubleshooting System Audio
If your screen is recording but you cannot hear the computer audio, check these settings.
Mac
Use Google Chrome
Choose Chrome Tab
Make sure Share tab audio is enabled
Select the correct tab before recording
Windows
Check that System Audio is enabled
Make sure you selected the correct screen, window, or tab
Try using Chrome if your current browser is causing problems
Before Recording a Long Video
It is a good idea to make a short test recording first.
Play some computer audio, speak into your microphone, and record your screen for a few seconds.
Then check that:
Your microphone can be heard
Your computer audio can be heard
Your screen is visible
Your webcam is visible if you want to use it
Once everything works correctly, you can start your full recording.
Quick Summary
For Mac, the easiest way to record computer audio in Podsplice is:
Chrome → Overdub Mode → Chrome Tab → Share Tab Audio → Record
For Windows:
Overdub Mode → Choose Screen/Window/Tab → Enable System Audio → Record
Once you finish, Podsplice keeps your screen, webcam, microphone, and system audio available as separate tracks so you can quickly create the final layout you want.
More from Podsplice

How to Screen Record with System Audio in 2026: The Easiest Way (Complete Guide)
Article
Send Podsplice transcripts to Notion
Article
How to Record an Online Coaching Call (Easy + High Quality)
Article
How to Record a Reaction Video in Canva (and the Faster Alternative)
Blog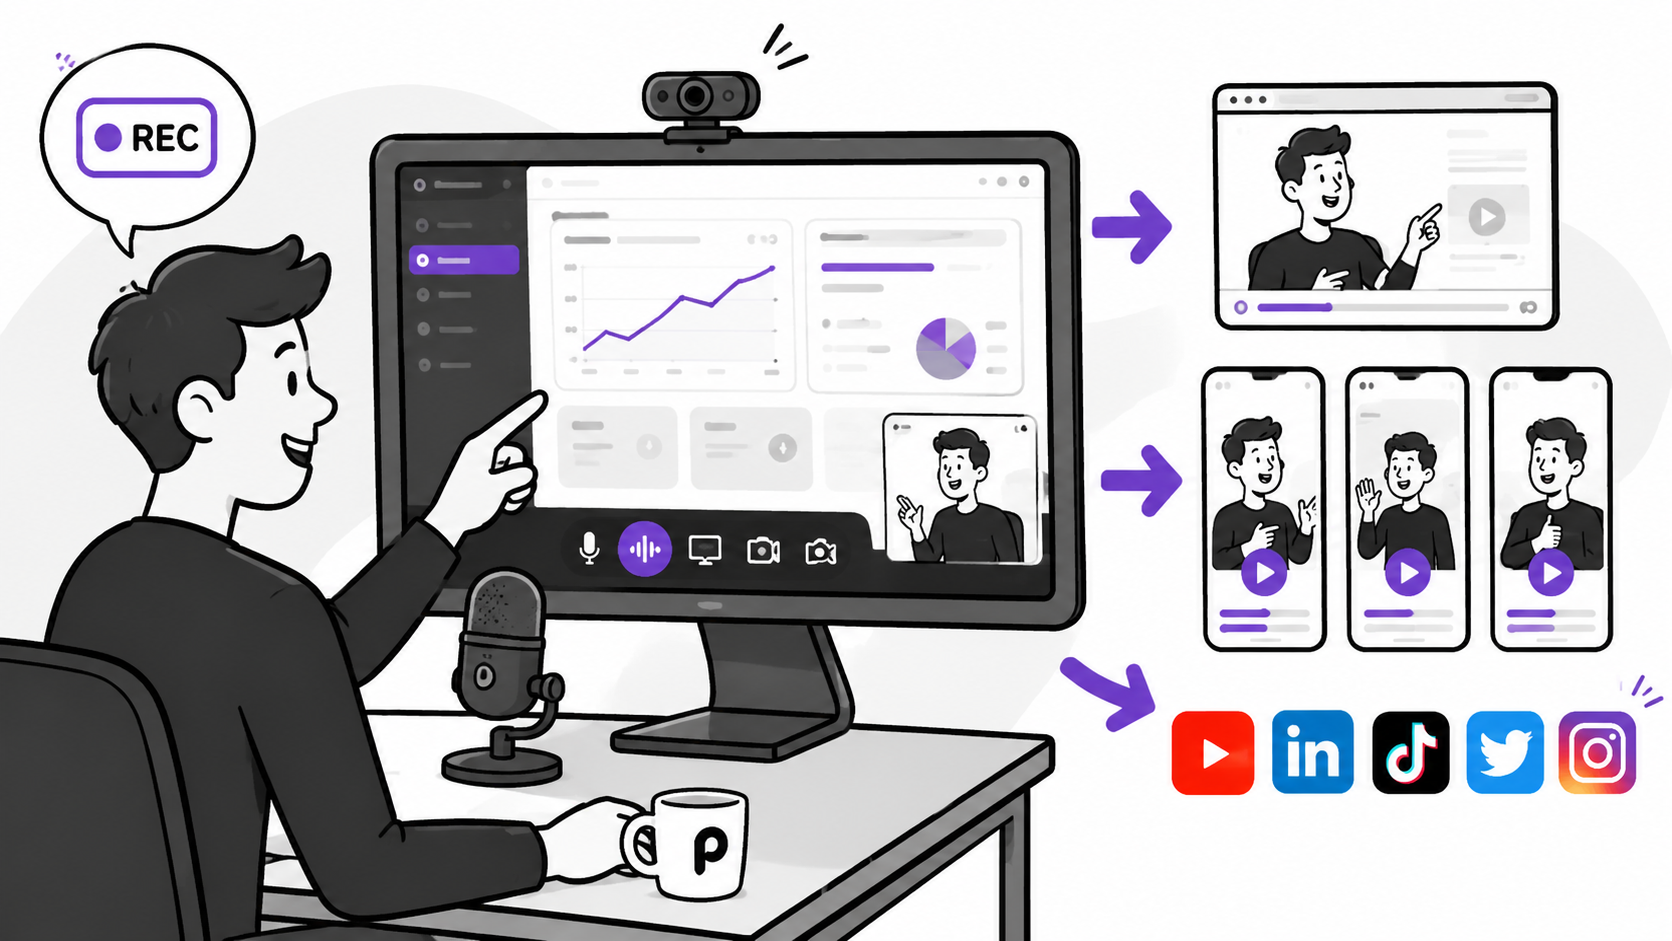
How to Promote Your SaaS with Screen Recording Demo Videos (2026)
Article
Start Recording in Seconds
No downloads. No setup. Just hit record and share your story with the world in studio quality.
Looking for a Screen Recorder or Remote Recording tool?