
Best Camera Settings for Video Podcasts, Screen Recordings & Online Courses
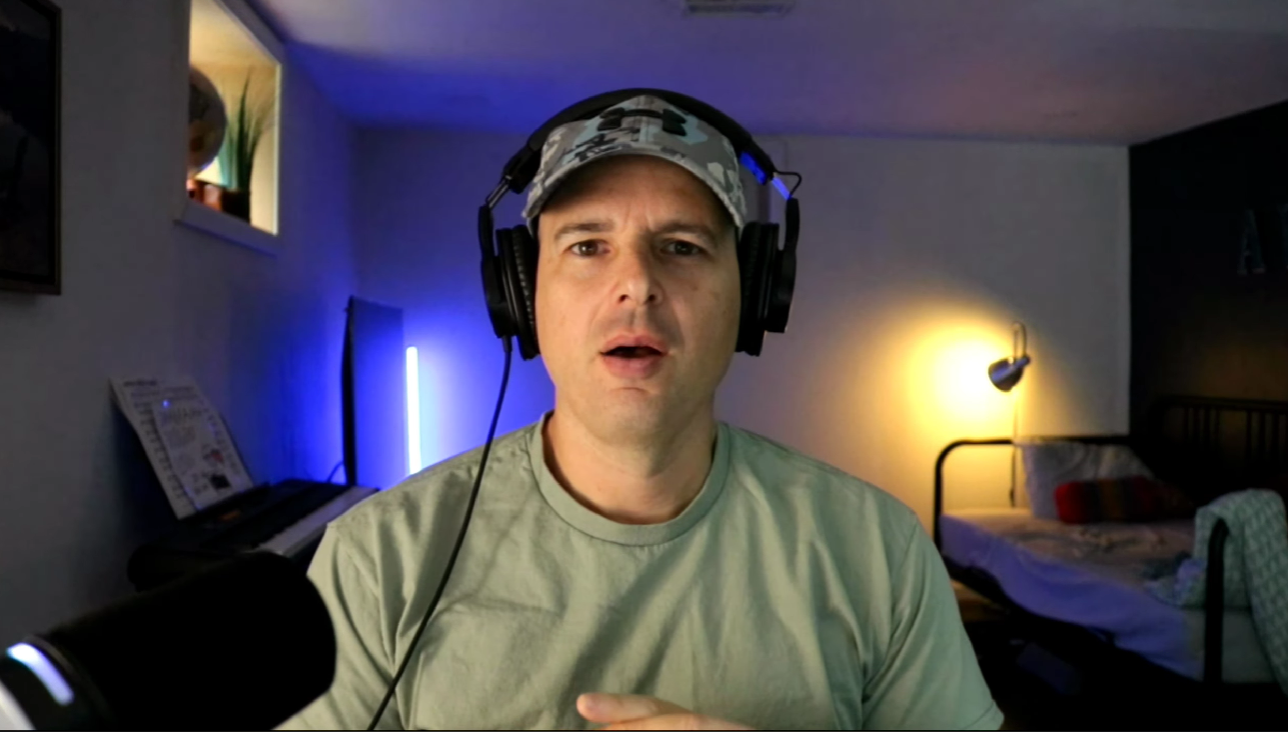
I just set up my new podcast studio in my basement.
I learned a lot while doing it, and I will share exactly what I learned about how to optimize your camera settings to make your podcast studio look how you want it to.
Most of the advice I found online did not work well for my particular studio. Everyone has a different setup, and you need to understand the camera basics if you want to do this right. You can't rely on standard advice or automatic settings.
I'll show you what worked (and didn't work) for my studio, and how you should think about custom camera settings for your own situation.
I'm using a 2015 Canon Rebel T6i, an older DSLR camera that I use for recording podcasts, screen tutorials, and other videos.
I have a small studio in my basement with blue and orange accent lighting. I also don't like having bright lights shining in my face because they give me headaches and migraines.
So I wanted to figure out how to get the best possible image without adding a bunch of bright studio lights (key lights) pointed anywhere near my face.
I was shocked at how dramatically I could change the image just by adjusting a few camera settings. And I was even more shocked at how the general recommendations made my video look horrible.
I'll explain all this in the article, but the first look I got was this: Lol.
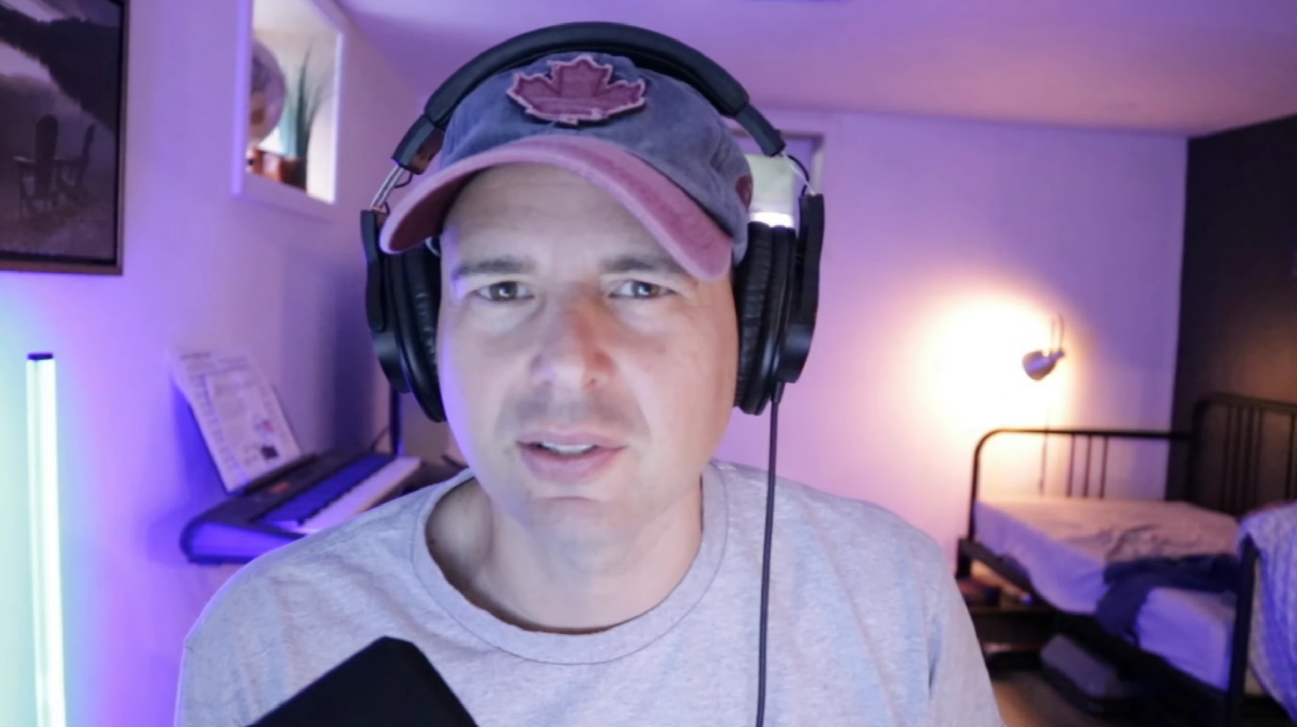
Look at how pink everything is. You can hardly see my orange and blue accent lights. This wasn't what I wanted at all.
The next look I got from following other advice was this:
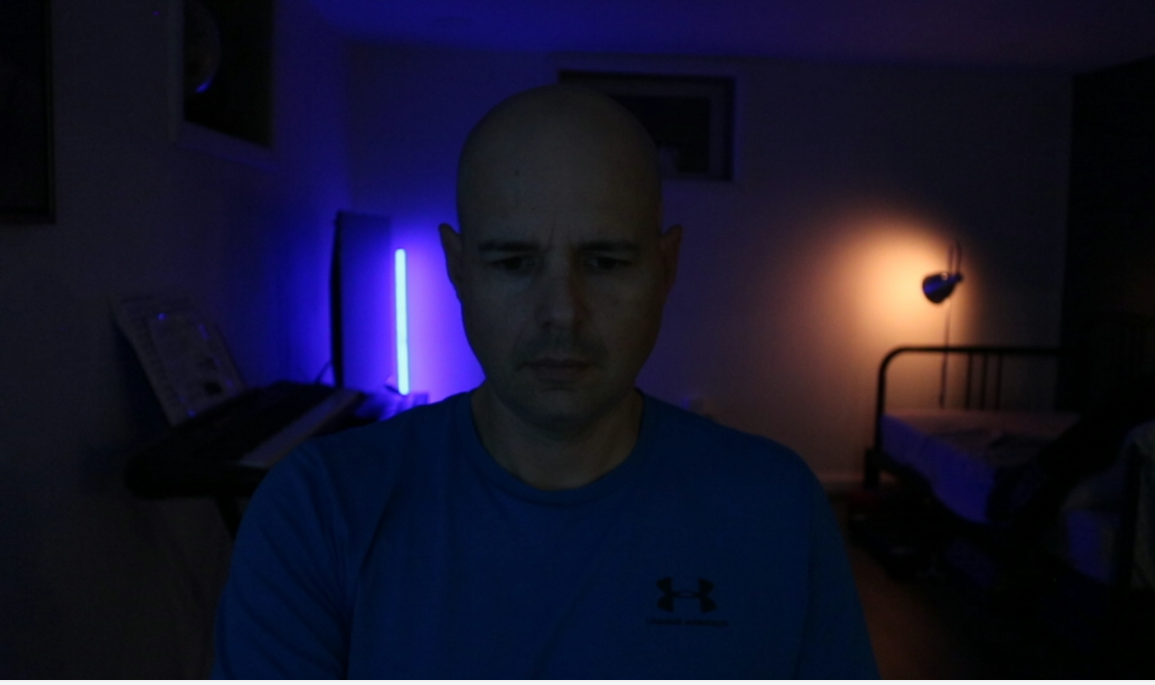
My blue and orange accent lights are looking cool, but my face is WAY too dark.
Here is what I got when I figured out what I needed to do:
You'll notice I'm in different clothes during all of these. It took me 3 days to figure this out!
I'm actually still making micro tweaks to my setup. I'll probably make the orange light a bit more orange (I think it is too yellow here).
Here is what I learned about choosing the best camera settings for podcasts and online courses.
1. Start With Manual Camera Settings
The first thing I'd recommend is switching your camera to manual exposure.
This is non-negotiable.
On many cameras, this is called M mode. Depending on your camera, you might need to enable manual exposure separately in the video settings.
The idea is simple.
Instead of letting the camera automatically decide how bright your image should be, you take control of the settings yourself.
This makes sense for someone recording podcasts, online courses, or screen tutorials because you're usually sitting in the same place with relatively consistent lighting.
Once you find settings that work, you don't want your camera constantly changing them.
Before I got into manual mode, I got that super pink look (above) when I was in automatic mode. The camera chose to almost average out my blue and orange lights into a pink look. I wanted them to be completely separate.
2. ISO: Don't Be Afraid to Turn It Up
One of the most common recommendations I've seen is to keep your ISO as low as possible.
Most articles recommend staying around ISO 100 - 200
That sounds reasonable, but it's a massive oversimplification.
First, let's talk about what ISO actually does.
The best analogy I've found is to think of ISO like the volume knob on an amplifier.
Your camera's sensor collects light, which is made up of photons. It converts that light into an electrical signal.
Increasing ISO amplifies the signal.
It's similar to turning up the volume on a recording.
If you have a clean audio recording, you can increase the volume and still get a good result.
But if the original recording is weak and noisy, increasing the volume makes that noise more noticeable too.
The same general idea applies to ISO.
But I'm in a relatively dark studio because I hate bright key lights. They give me migraines. A lot of people don't want a lot of light in their face either, even if they aren't migraine sufferers.
In my studio, an ISO setting of 100 or 200 would make me look like I'm in total darkness.
Even an ISO setting of 800 gave me this (still super dark).
Increasing ISO doesn't create more light. It makes the image brighter by amplifying the signal.
And depending on the camera and how much light you're working with, higher ISO settings can make noise more visible.
But that doesn't mean ISO 1600 is automatically bad.
In my basement studio, I've been using ISO 1600 with my Canon T6i, and I'm pretty happy with the results.
Here is another shot I got with ISO 1600
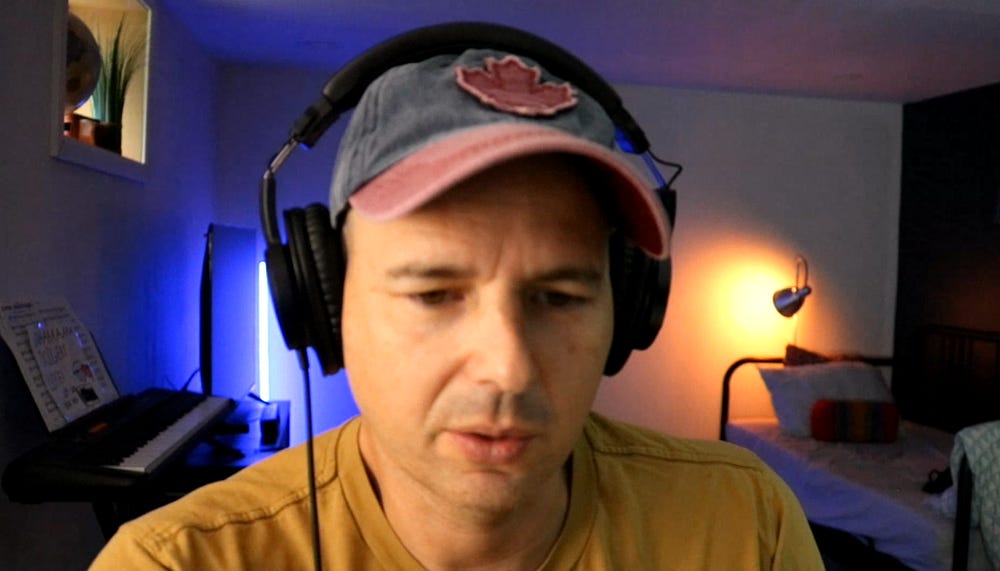
I actually like the orange color of the light in this one, but I'm just a little too close to the camera.
The lighting on my face is identical in this image to the one above it with the ISO 800. But you can actually see my face in this one!
If you don't mind bright key lights shining in your face, or even at a 45 degree angle to your face, then you can try that and also use a much lower ISO setting.
But again, for me, I don't want brighter lights shining in my face.
And I'd much rather have an image that looks good at ISO 1600 than an image that's too dark because I'm following some arbitrary rule about staying below ISO 800.
My recommendation is to first sit in a room with lighting you are comfortable with. Then adjust the ISO setting and see what looks best.
Using more light on your face is a good thing, in general, if you can handle it. But if you hate it as much as I do, just increase the ISO setting to make up for it. There is a trade-off, but for me, it's more than worth it.
3. White Balance: Why My Camera Looked Pink
This was probably the most interesting part of my experiments.
White balance controls how your camera interprets colours under different lighting conditions.
Different types of light have different colour characteristics.
For example, traditional incandescent lighting tends to look warm or orange, while daylight is generally cooler.
Your camera has different white balance settings to compensate for these differences.
On my Canon T6i, I experimented with three settings:
Auto White Balance (AWB): The camera tries to figure out the appropriate colour correction automatically.
Tungsten: Designed for warmer incandescent lighting, so it applies a cooler correction.
Daylight: Uses a fixed white balance intended for daylight conditions.
My studio has both blue and orange lighting, which makes things a little more complicated.
When I tried Tungsten, the image became much cooler. Some of the colours looked quite blue or purple.
Here is what my Tungsten white balance looked like:
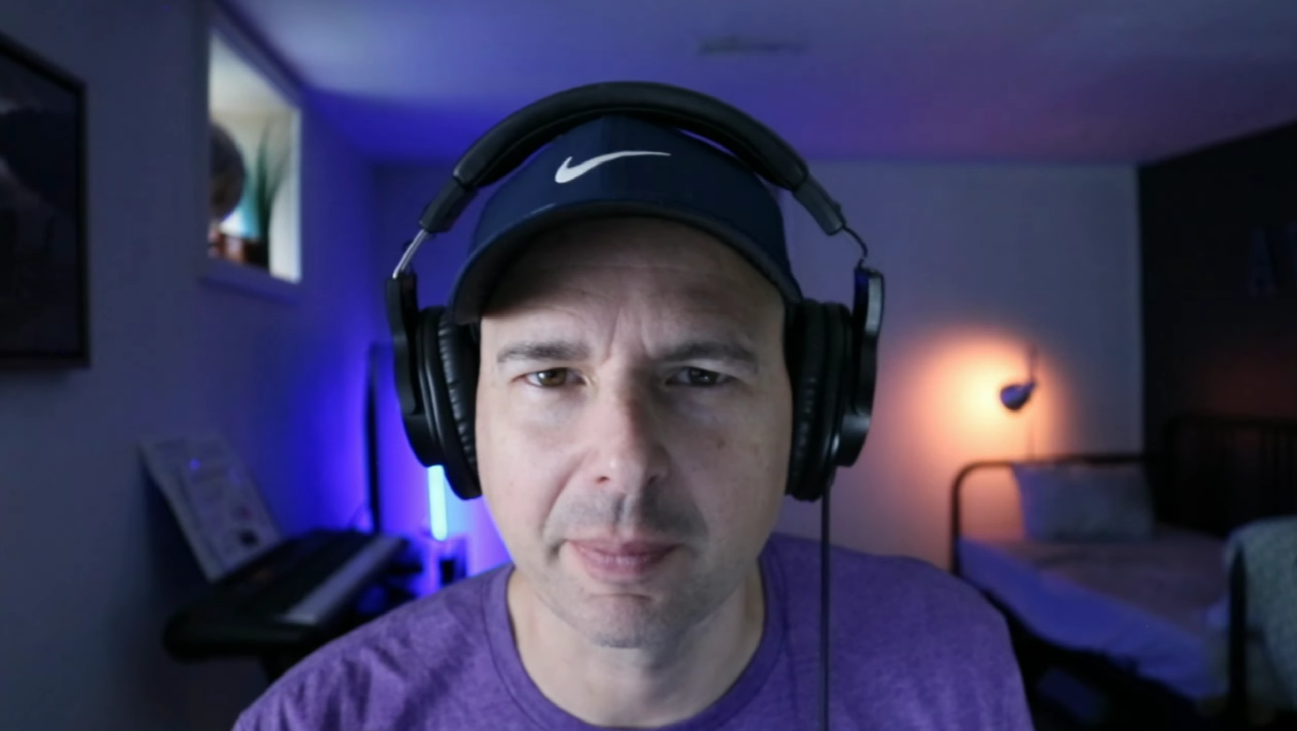
To be honest, I kind of like the tungsten light colors. The only reason I'm not using it is that it makes my face look too pale, like it's the middle of winter and I haven't been in the sun in several months.
When I tried Daylight, I generally preferred how my skin tones looked while still keeping the blue and orange atmosphere of the room.
4. Exposure Compensation: What Does +2 Actually Mean?
This was something I had been using without fully understanding it.
On my Canon camera, I had previously been experimenting with P mode, or Program Auto, where the camera automatically chooses certain exposure settings.
I also had exposure compensation set to +2.
What does that mean?
Exposure compensation lets you tell the camera to make its automatically calculated exposure brighter or darker.
A setting of +1 means one stop brighter.
A setting of +2 means two stops brighter.
And here's something I didn't realize until I started learning more about camera exposure:
Two stops brighter means four times the exposure.
That's a pretty big difference.
So when I was using +2, I wasn't just asking the camera to make a tiny adjustment. I was telling its automatic exposure system to aim for a substantially brighter image.
In my studio, that contributed to an overly bright, washed-out, and pink result.
The reason I even started playing around in manual mode was that I couldn't get the separate blue and orange background lights to look blue and orange.
5. My Actual Camera Settings
After experimenting with different settings, here's approximately where I ended up.
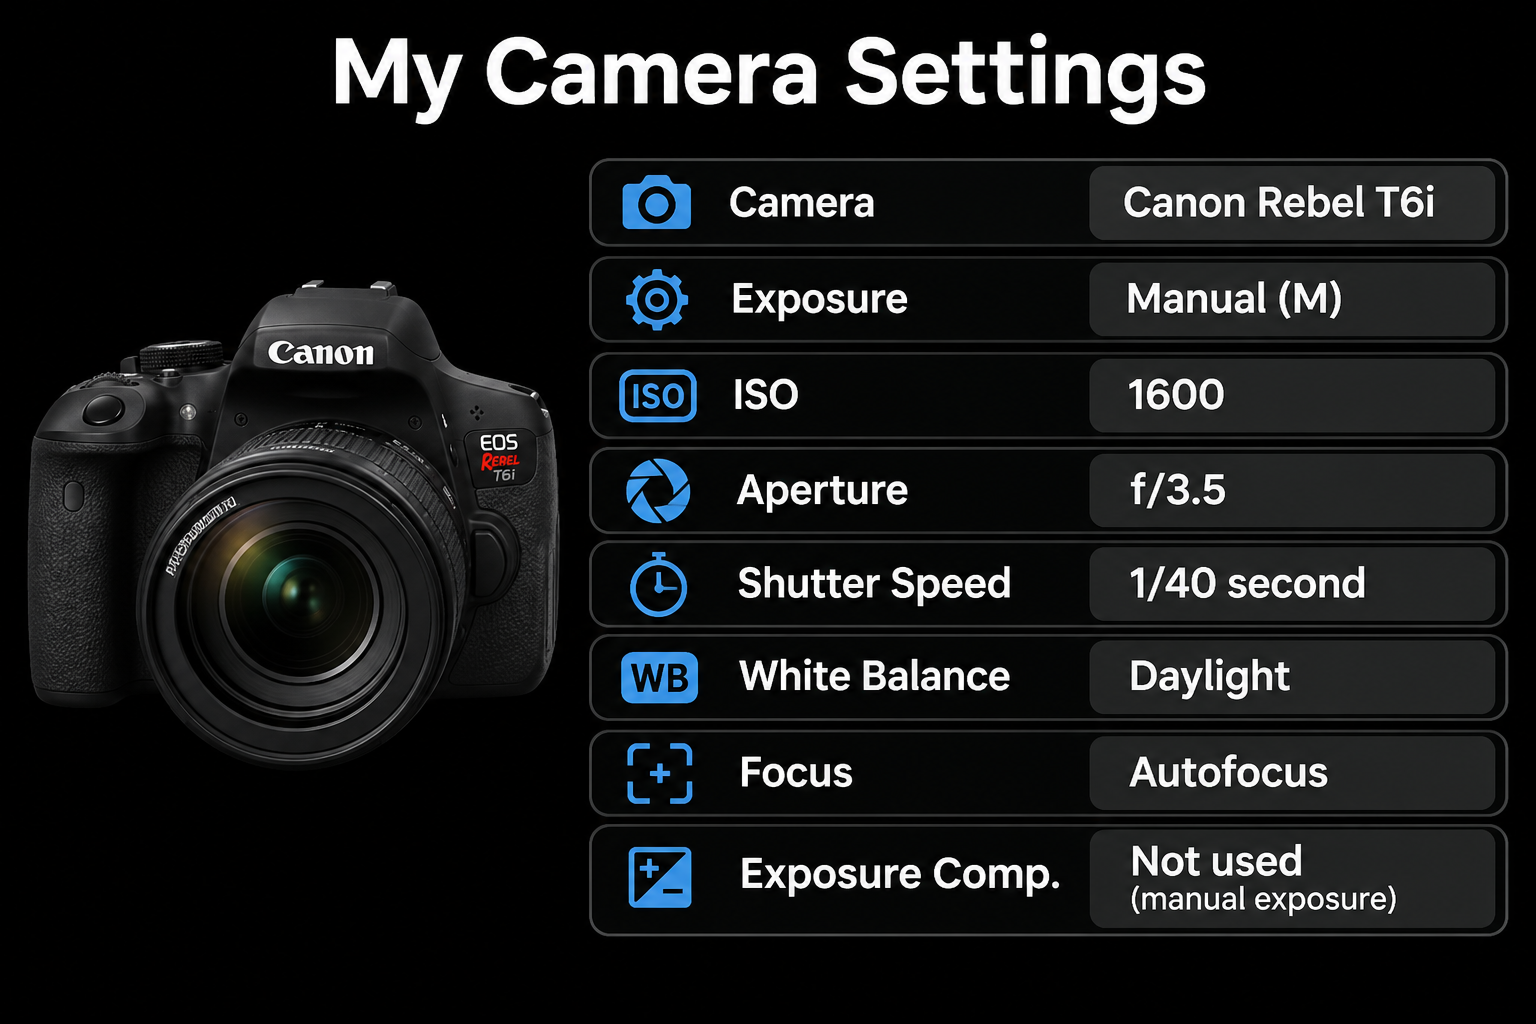
My Video Podcast Camera Settings
Camera: Canon Rebel T6i
Exposure Mode: Manual (M)
ISO: 1600
Aperture: f/3.5
Shutter Speed: 1/40 second
White Balance: Daylight
Focus: Autofocus
Exposure Compensation: Not used (manual exposure)
I'm not suggesting these are the perfect settings for everyone.
In fact, that's one of the main things I've learned.
Your ideal settings depend on your camera, your lens, your lighting, and what you're trying to achieve.
For example, I also have a Canon 50mm f/1.8 lens that I've experimented with at f/2.2.
Because it has a wider maximum aperture than my kit lens, it can let in more light. But it also changes the framing and depth of field.
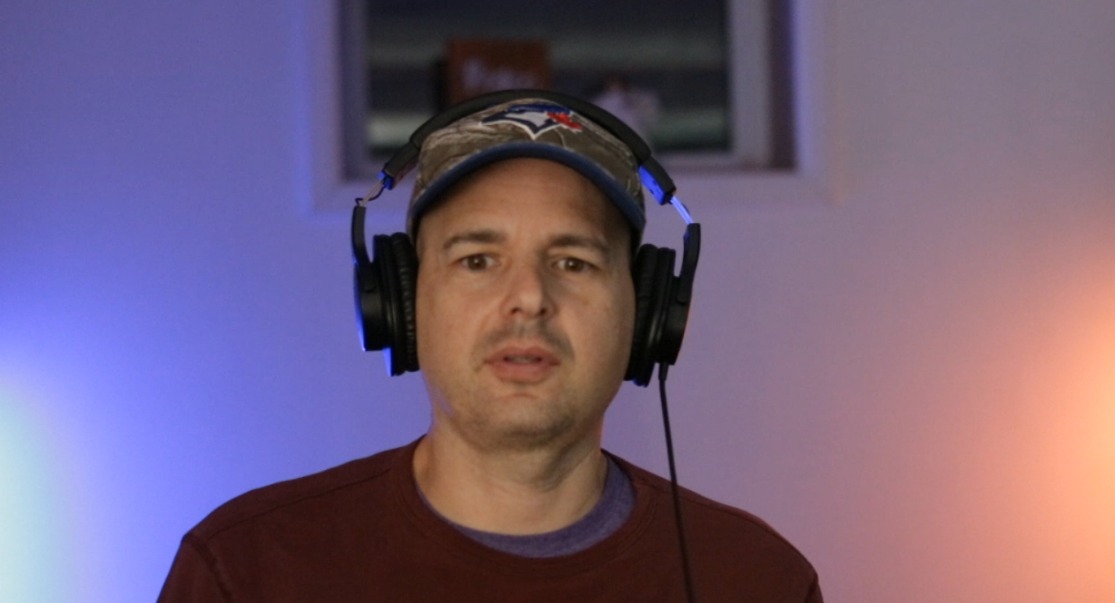
I'm slightly out of focus because I was using manual focus and I couldn't see myself in the viewfinder. But you can see the blurred background. I'm able to sit much further back from the camera. Also, the depth of field is shallower, so the subject (me) can be in focus, and the background is blurred on purpose (bokeh effect).
6. These Settings Aren't Just for Podcasting
Although I've been experimenting with these settings for podcasting, the same principles apply to almost anyone recording themselves on camera.
For example, I regularly record screen tutorials where I'm showing people how to use software while also appearing on camera.
I also create instructional videos and online content.
Whether your face fills the entire screen or appears in a small rectangle while you're demonstrating something, your camera settings still matter.
I use Podsplice, the recording and editing platform I co-founded with my brother, to record podcasts, screen tutorials, and videos.
I wrote here why I believe Podsplice is the best podcast recording software.
Final Thoughts
The biggest thing I learned from these experiments is that you don't necessarily need to buy a new camera or a bunch of expensive lighting equipment to improve your videos.
Sometimes you just need to understand the camera you already have.
For me, three things made the biggest difference:
ISO: Understanding what it actually does and why higher settings aren't automatically bad.
White balance: Learning how different settings change the colours in my studio.
Exposure compensation: Understanding why my old +2 automatic exposure setup was making my footage much brighter than I wanted.
Switching to manual exposure helped me control all of this more consistently.
I'm still experimenting, and I'm certainly not claiming to be a professional cinematographer.
But I now understand my camera a lot better than I did a few weeks ago.
And I think that's more useful than blindly following a list of supposedly perfect camera settings.
Try the settings yourself. Look at the actual footage. And figure out what works for your camera and your studio.
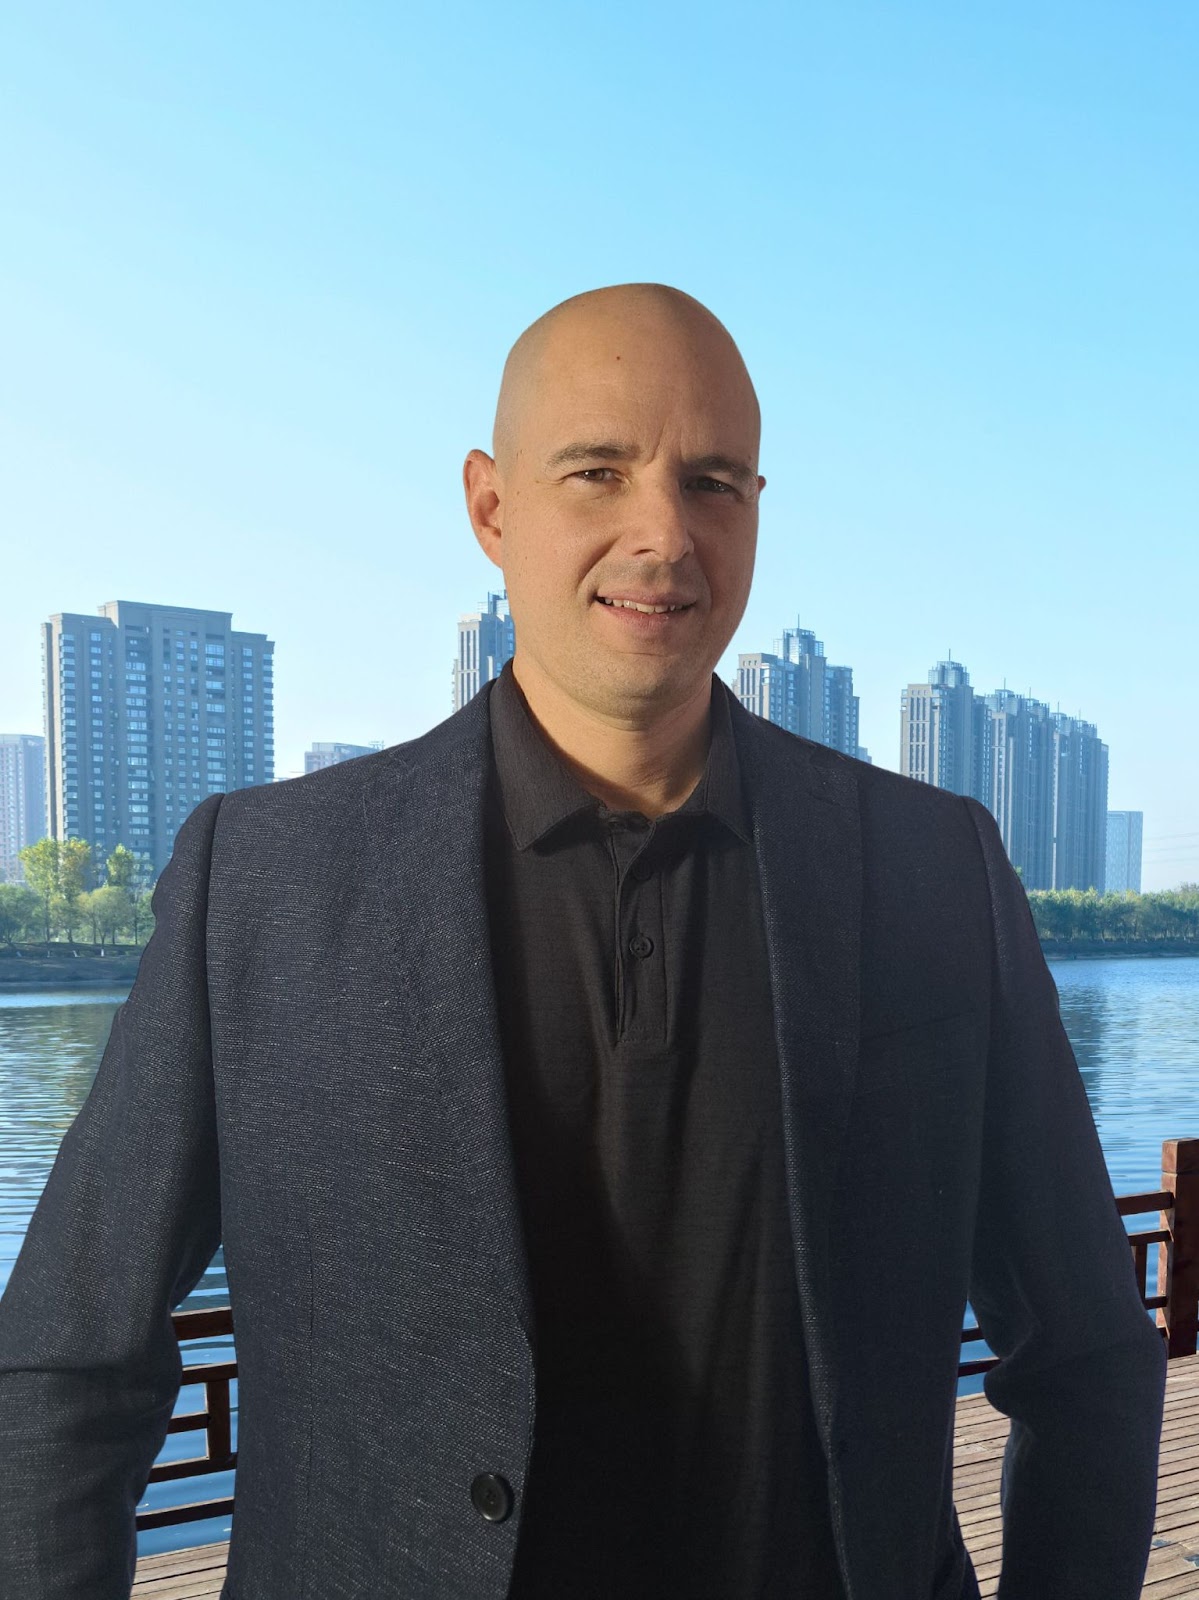
About the Author
Andrew Best
Andrew Best is an entrepreneur, educator, and AI expert with over two decades in online marketing. He co-founded China232 — a podcast and learning platform with 10M+ downloads — and later 88Herbs, a premium supplement company. Andrew now focuses on helping creators leverage AI for podcasting, screen recording, and YouTube content through Podsplice.
More from Podsplice
Repurposing: Turn Long Podcasts into Viral Shorts
Article
Why Most Screen Recording Software Is Terrible for YouTube Videos (And What Creators Actually Need)
Article
How to Start a Faceless YouTube Channel Without AI (2026 Guide)
Article
System Audio vs. Tab Audio: Important Differences for High-Quality Screen Recording
Article
How to Get Real Estate Leads From YouTube (Step-by-Step)
Article
Start Recording in Seconds
No downloads. No setup. Just hit record and share your story with the world in studio quality.
Looking for a Screen Recorder or Remote Recording tool?